Initial Configuration of WinHorizon
Before proceeding with the setup, please ensure that WinHorizon is correctly installed.
Publishing the Trust Chain
This section details how to publish the trust chain within Active Directory.
| If several WinHorizon servers are installed, the procedure detailed in this section must only be executed once. If the trust chain is already published, this procedure does not need to be performed. |
1. Launch a 'cmd.exe' using a privileged account (using the 'RunAs' command);
2. Execute the following command to add Root CA:
certutil -f -dspublish "C:\<PATH_TO_ROOT_CA_CERTIFICATE>" rootca3. Execute the following command to add Subordinate CA:
certutil -f -dspublish "C:\<PATH_TO_SUBORDINATE_CA_CERTIFICATE>" subca4. Execute the following command to push new Active Directory schema:
certutil -pulseRequest WinHorizon Authentication Certificate
Open the EverTrust WinHorizon Configurator and go to the Authentication tab.
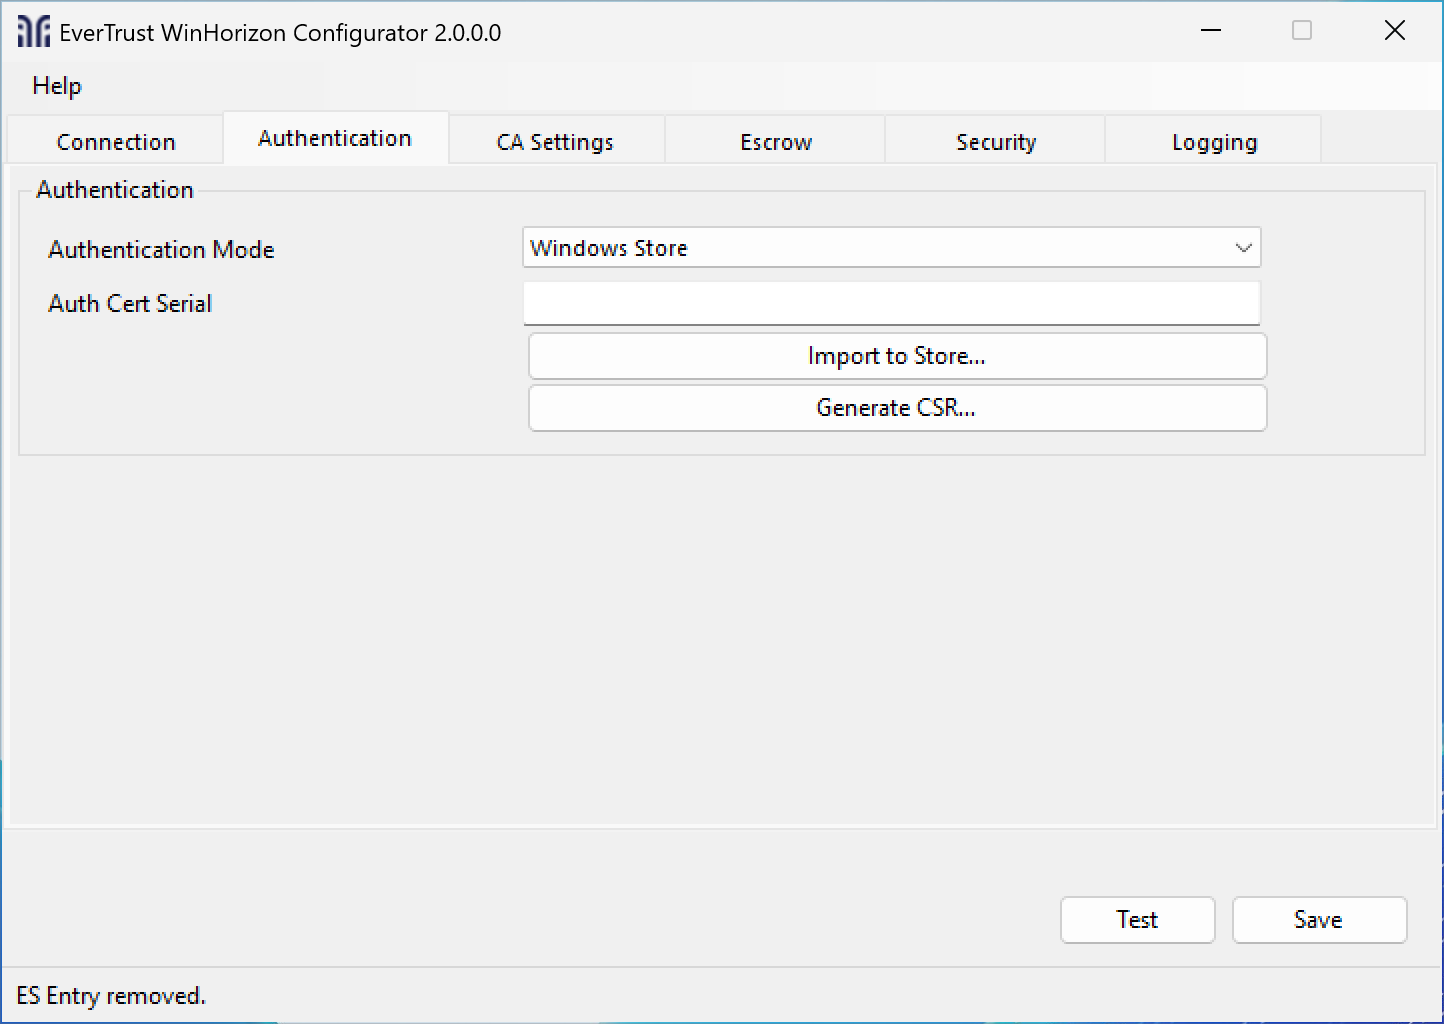
Then click the Generate CSR button and fill in the fields you need, leave a field blank if it is not needed (it will not appear in the CSR).
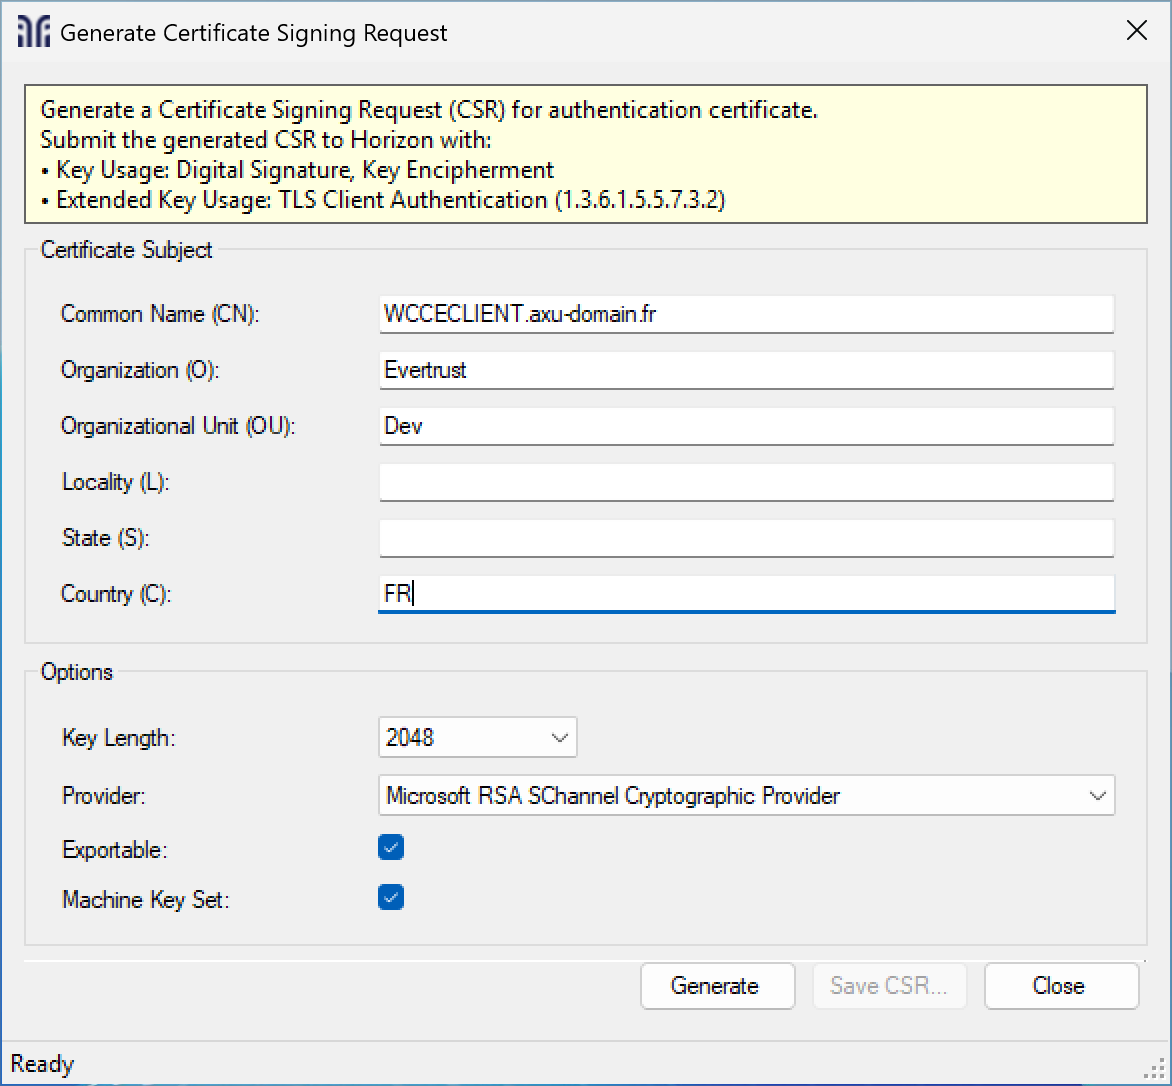
| We recommend leaving the options as default. |
When you have completed all the necessary fields, click the Generate button and then use the Save CSR button to save the CSR somewhere you can find it.
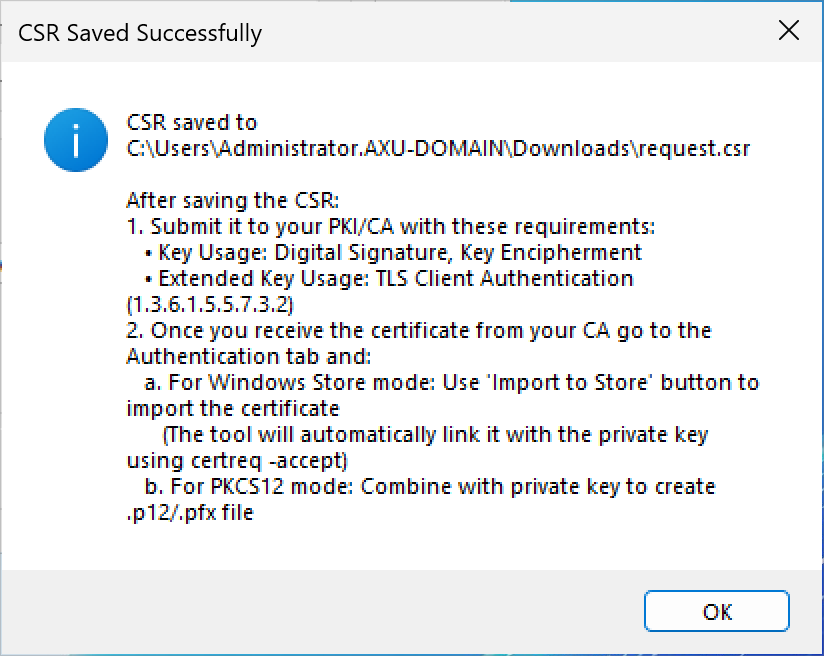
Use this CSR to sign the certificate with your PKI / CA and download the newly created certificate in PEM format.
After downloading the certificate, go back to the Authentication tab, click the Import Certificate button and choose the certificate.
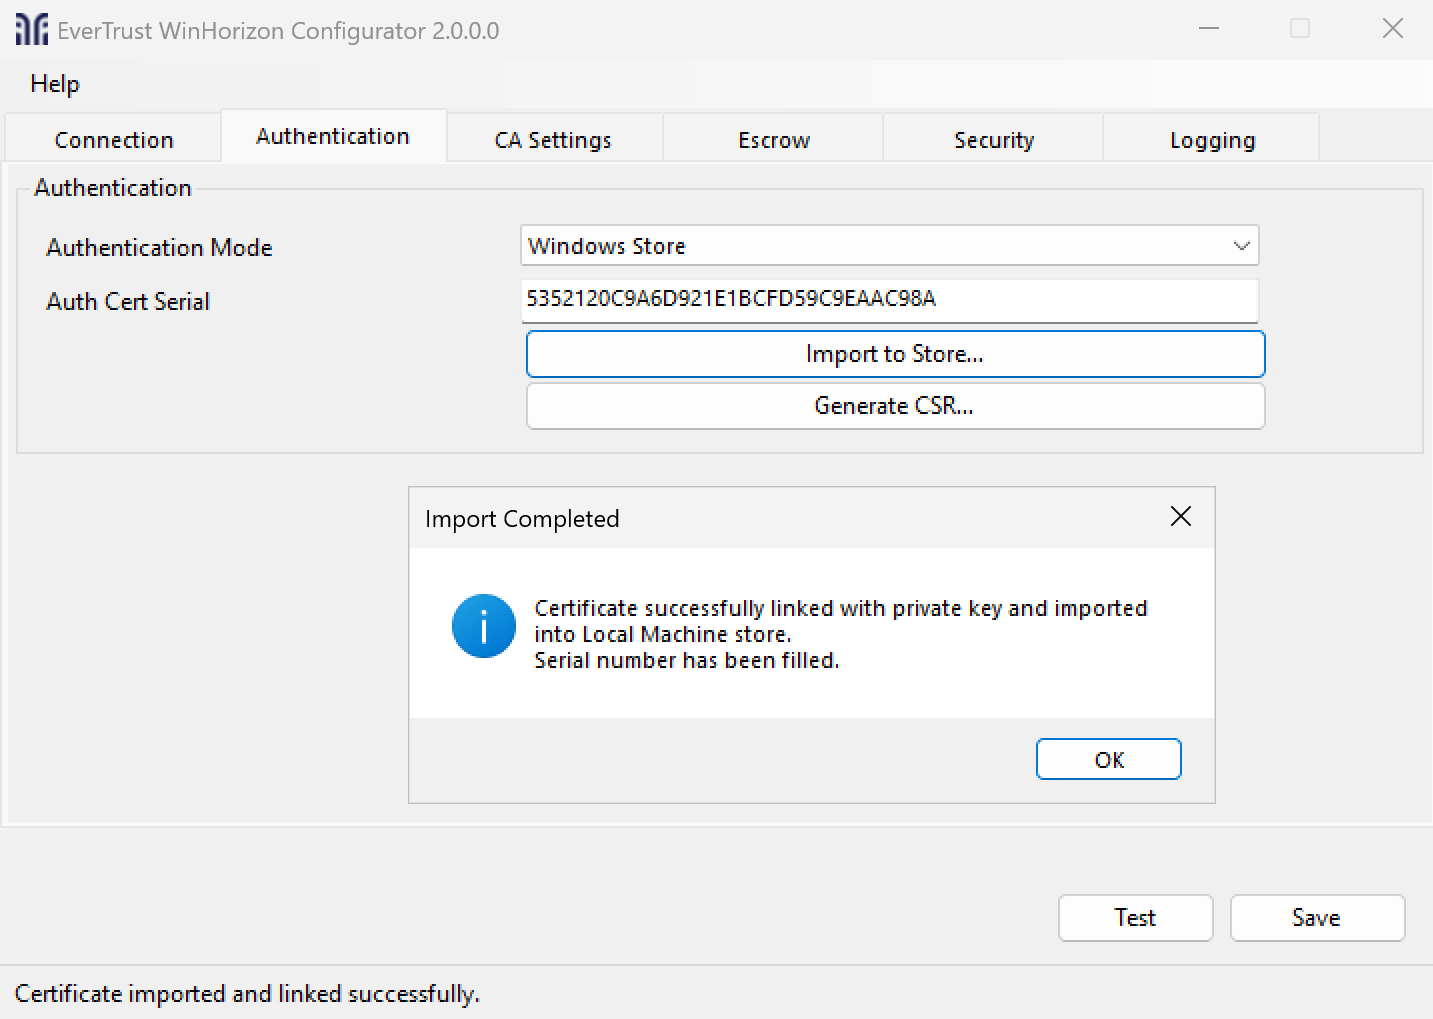
| Check that you are in the "Windows store" authentication mode. |
After a successful import, you should see a confirmation message as well as the serial number being filled in the specific field. If the import errors out, the serial will also be filled, but you will need to reconcile the request or restart the authentication certificate step.
| Don’t close the configurator since it will be needed afterward. |
TLS 1.2 Configuration
Before proceeding, you need to activate TLS v1.2. To enable TLS 1.2, please add the following registry entries:
Windows Registry Editor Version 5.00

[HKEY_LOCAL_MACHINE\SOFTWARE\Microsoft\Windows\CurrentVersion\Internet Settings\WinHttp]
      "DefaultSecureProtocols" = (DWORD): 0xAA0
[HKEY_LOCAL_MACHINE\SOFTWARE\Wow6432Node\Microsoft\Windows\CurrentVersion\Internet Settings\WinHttp]
      "DefaultSecureProtocols" = (DWORD): 0xAA0

[HKEY_LOCAL_MACHINE\SOFTWARE\Microsoft\.NETFramework\v2.0.50727]
      "SystemDefaultTlsVersions" = dword:00000001
      "SchUseStrongCrypto" = dword:00000001
[HKEY_LOCAL_MACHINE\SOFTWARE\Microsoft\.NETFramework\v4.0.30319]
      "SystemDefaultTlsVersions" = dword:00000001
      "SchUseStrongCrypto" = dword:00000001

[HKEY_LOCAL_MACHINE\SOFTWARE\Wow6432Node\Microsoft\.NETFramework\v2.0.50727]
      "SystemDefaultTlsVersions" = dword:00000001
      "SchUseStrongCrypto" = dword:00000001
[HKEY_LOCAL_MACHINE\SOFTWARE\WOW6432Node\Microsoft\.NETFramework\v4.0.30319]
      "SystemDefaultTlsVersions" = dword:00000001
      "SchUseStrongCrypto" = dword:00000001
You can also directly download this .reg file and execute it on the concerned server. Note that it has the .txt extension to not be flagged as dangerous by antiviruses but if you want to use it, you will have to give it back the .reg extension.
Active Directory Configuration
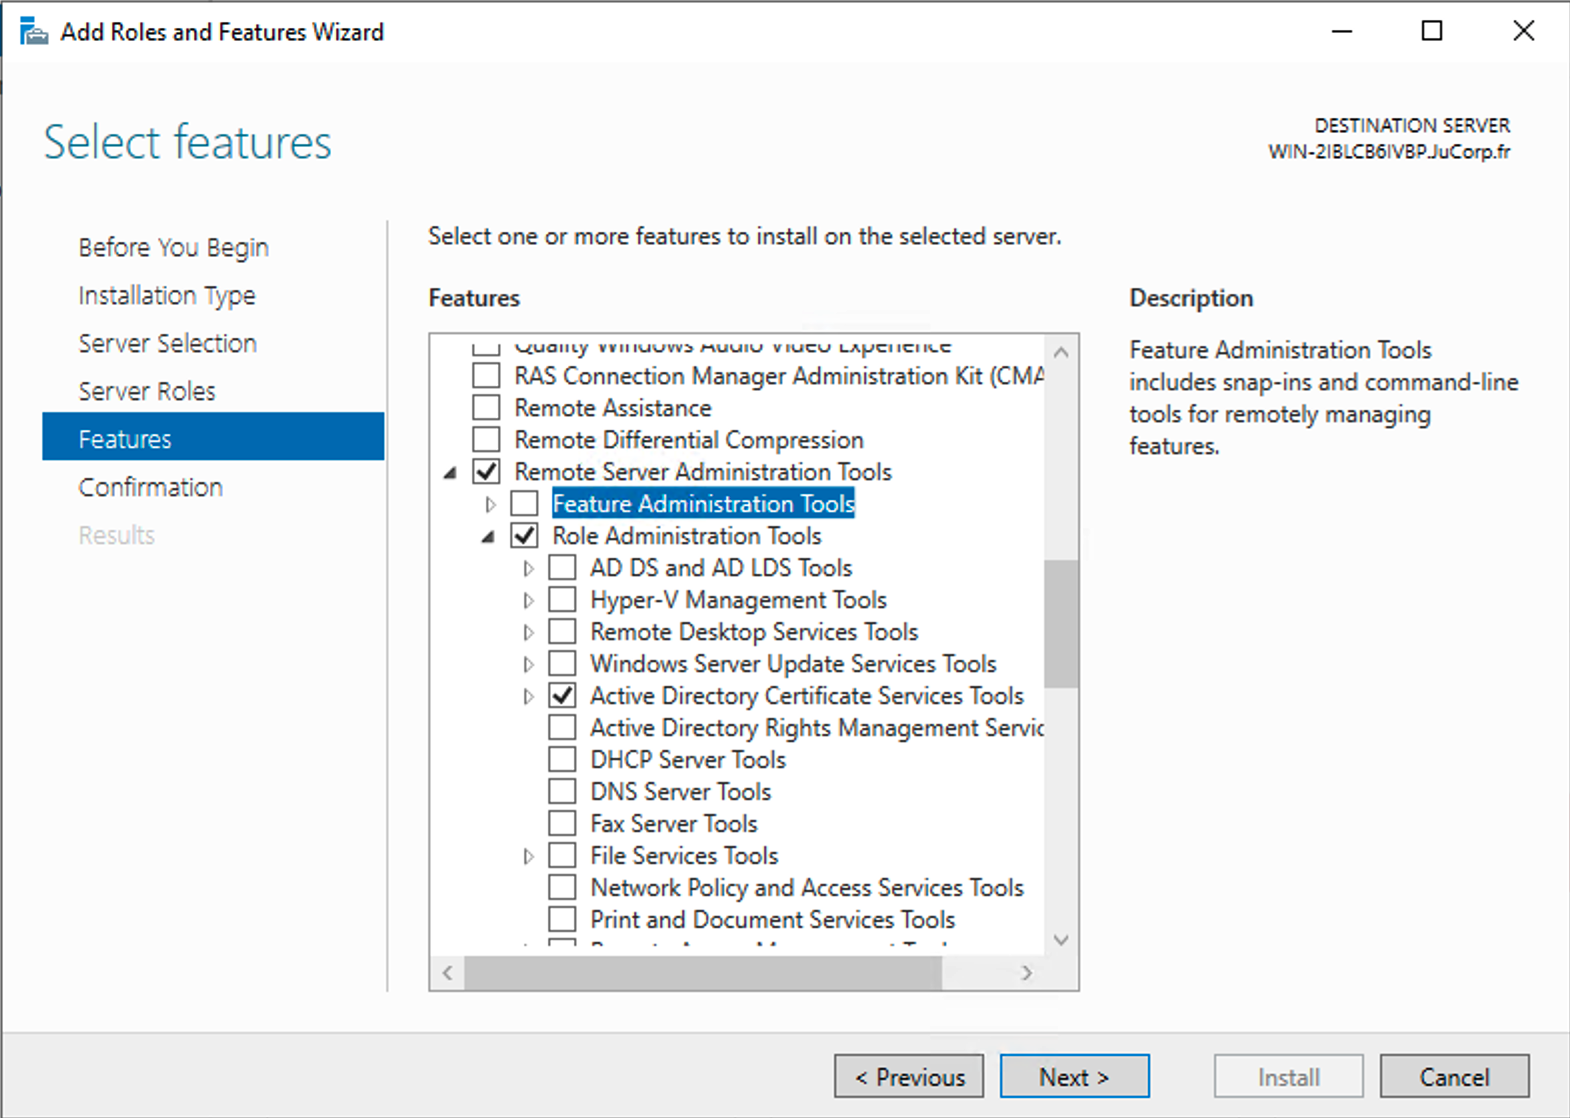
To access the Microsoft Certificate Template, you should install Remote Server Administration Tools (RSAT). If it’s not on your windows server, you can follow the steps below to install it:
1. Open the Server Manager tool.
2. Select Manage > Add Roles and Features.
3. Select Features and expand Remote Server Administration Tools > Role Administration Tools > Active Directory Certificate Services Tools.
4. Select Certification Authority Management Tools.
5. Select Next and then select Install.
Configure Certificate Templates
To update or create Certificate template, you need to press Win + R and execute mmc.exe. Select File > Add/Remove Snap-in.
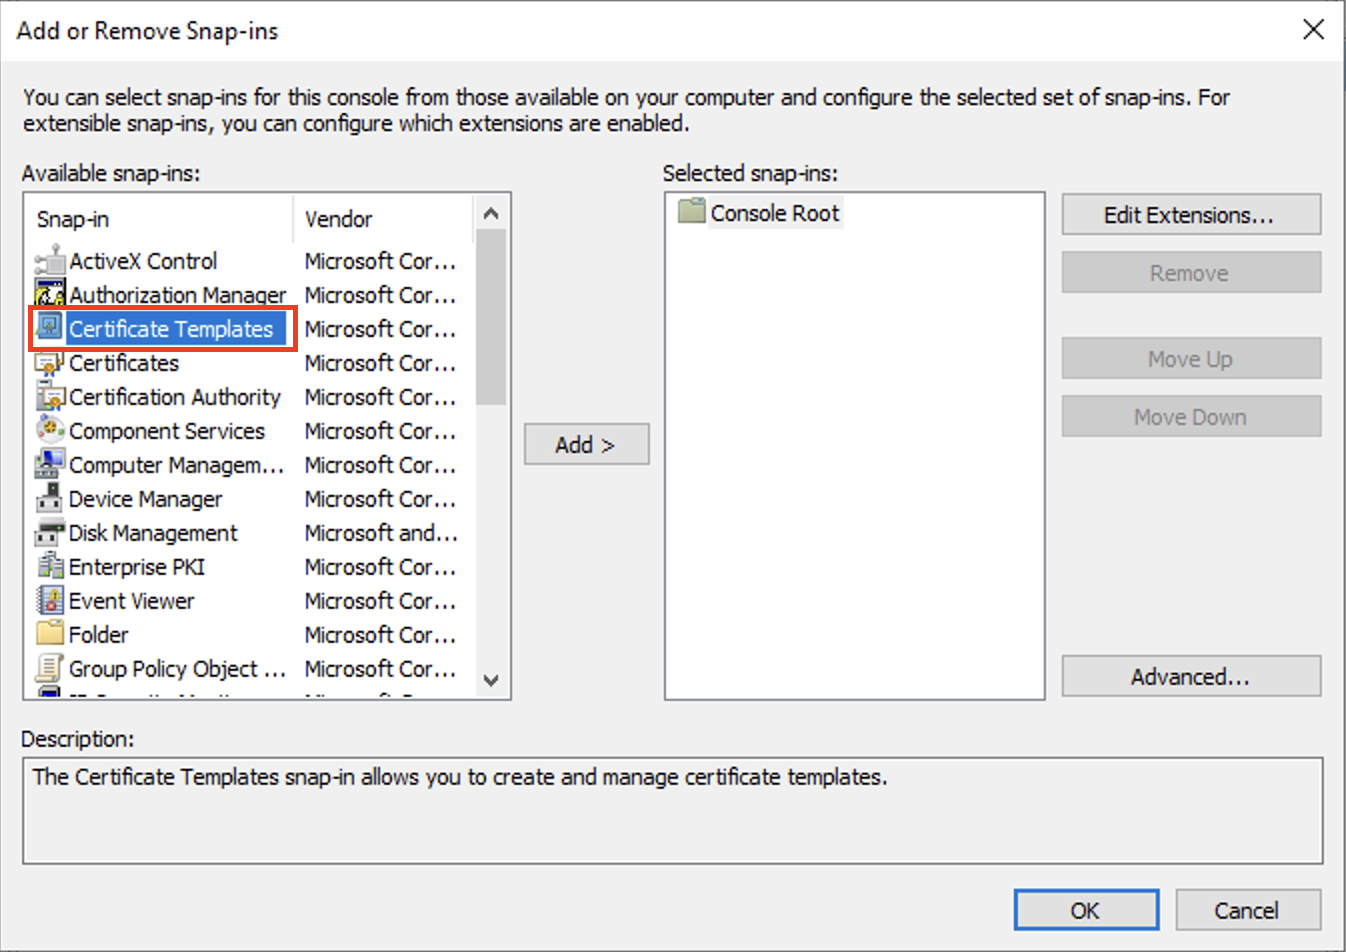
Click on Certificate templates, you should see all the templates available in the forest. EVERTRUST advises to duplicate existing Microsoft Certificate Template in order to create new ones consumed by WinHorizon.
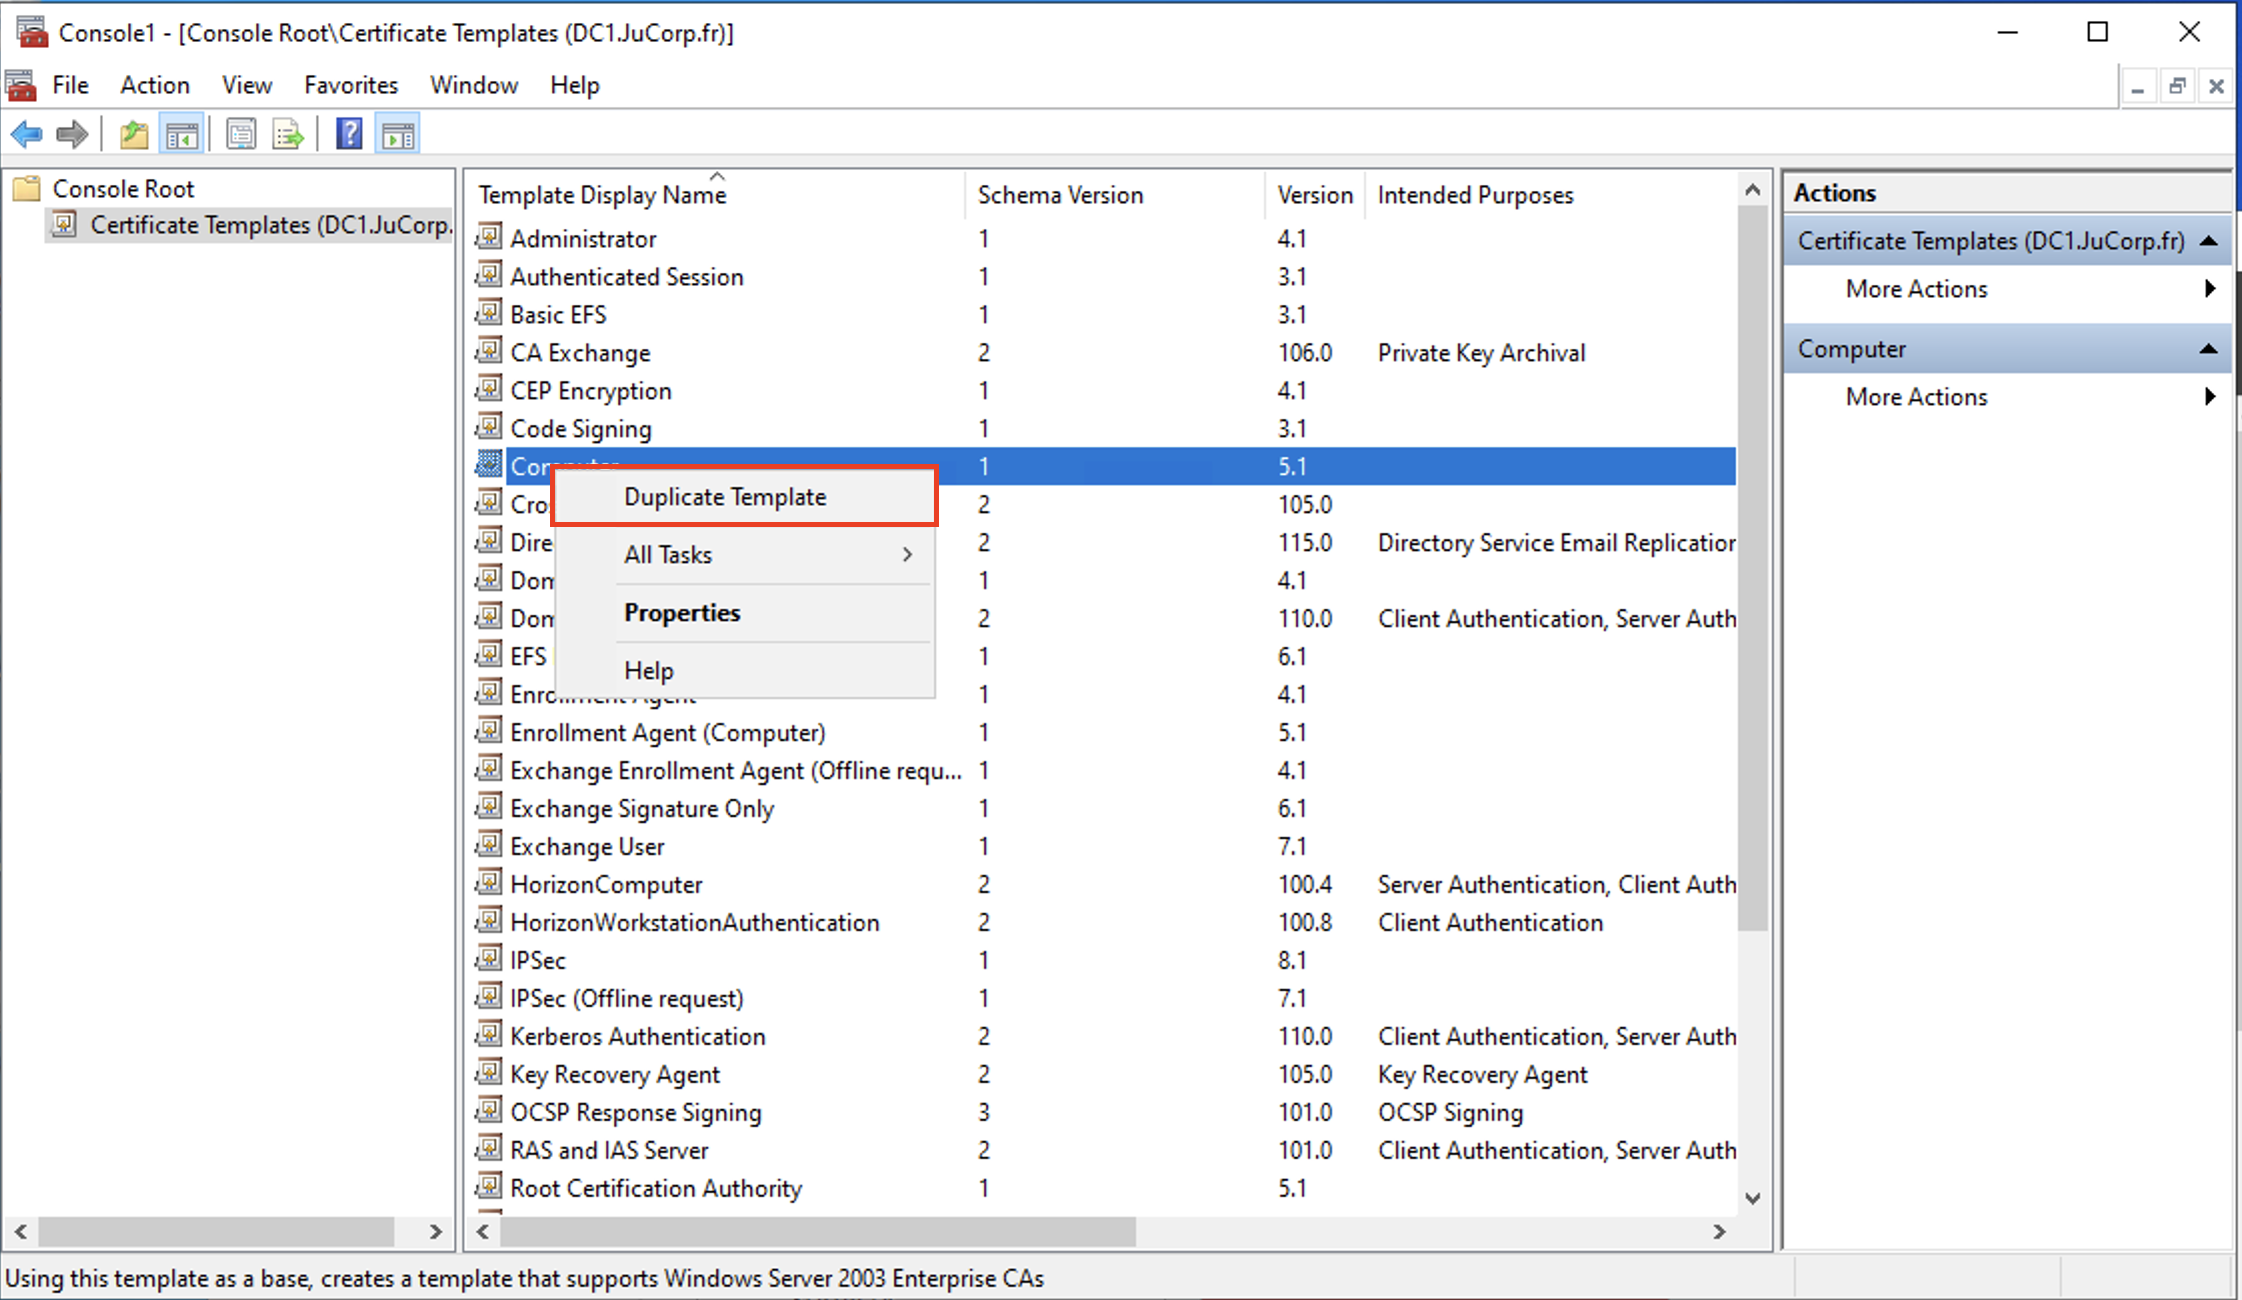
| Don’t configure template names with spaces and take notes of the template names you will be using with WinHorizon. They will be needed in the WinHorizon configurator. |
To check the authorizations on the different templates, you can right click on a template and choose properties. WinHorizon requires each template it manages to have at least the permission Read for the group Authenticated Users.
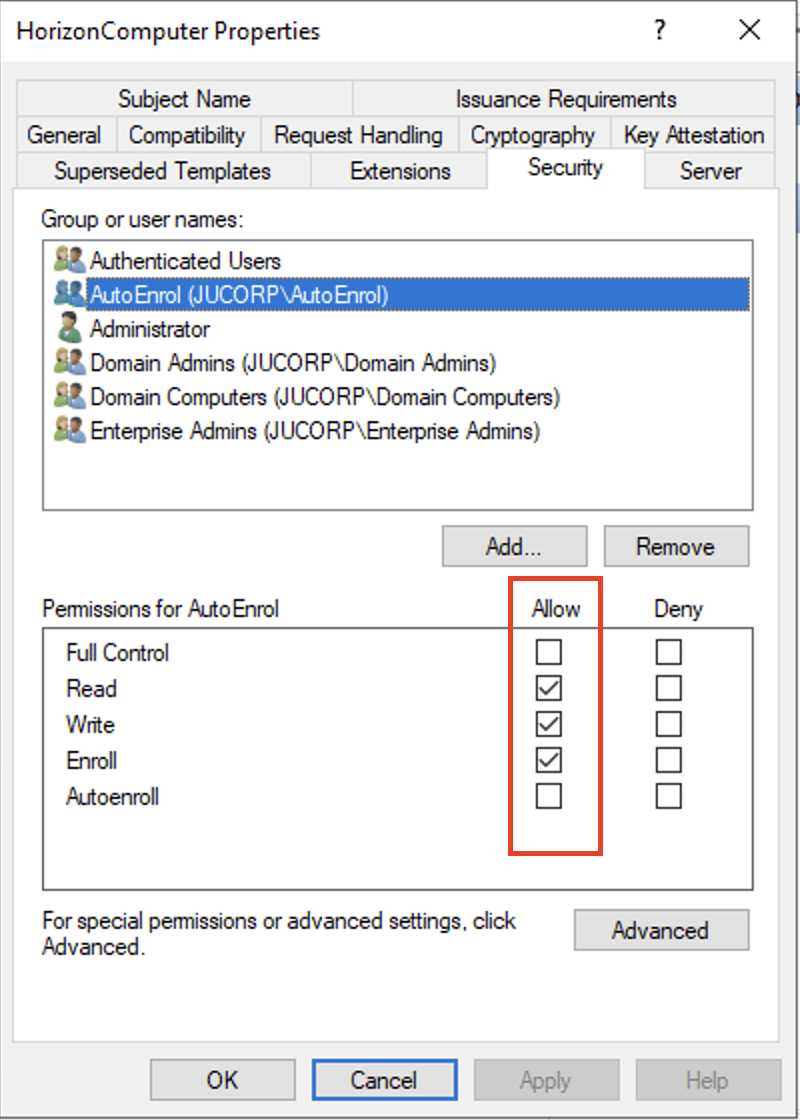
Moreover, EverTrust recommends creating AD local groups and grant Read/Enroll/Auto enroll rights on proper Microsoft Certificate.
For more details, please refer to the Active Directory Configuration section in the administration guide.
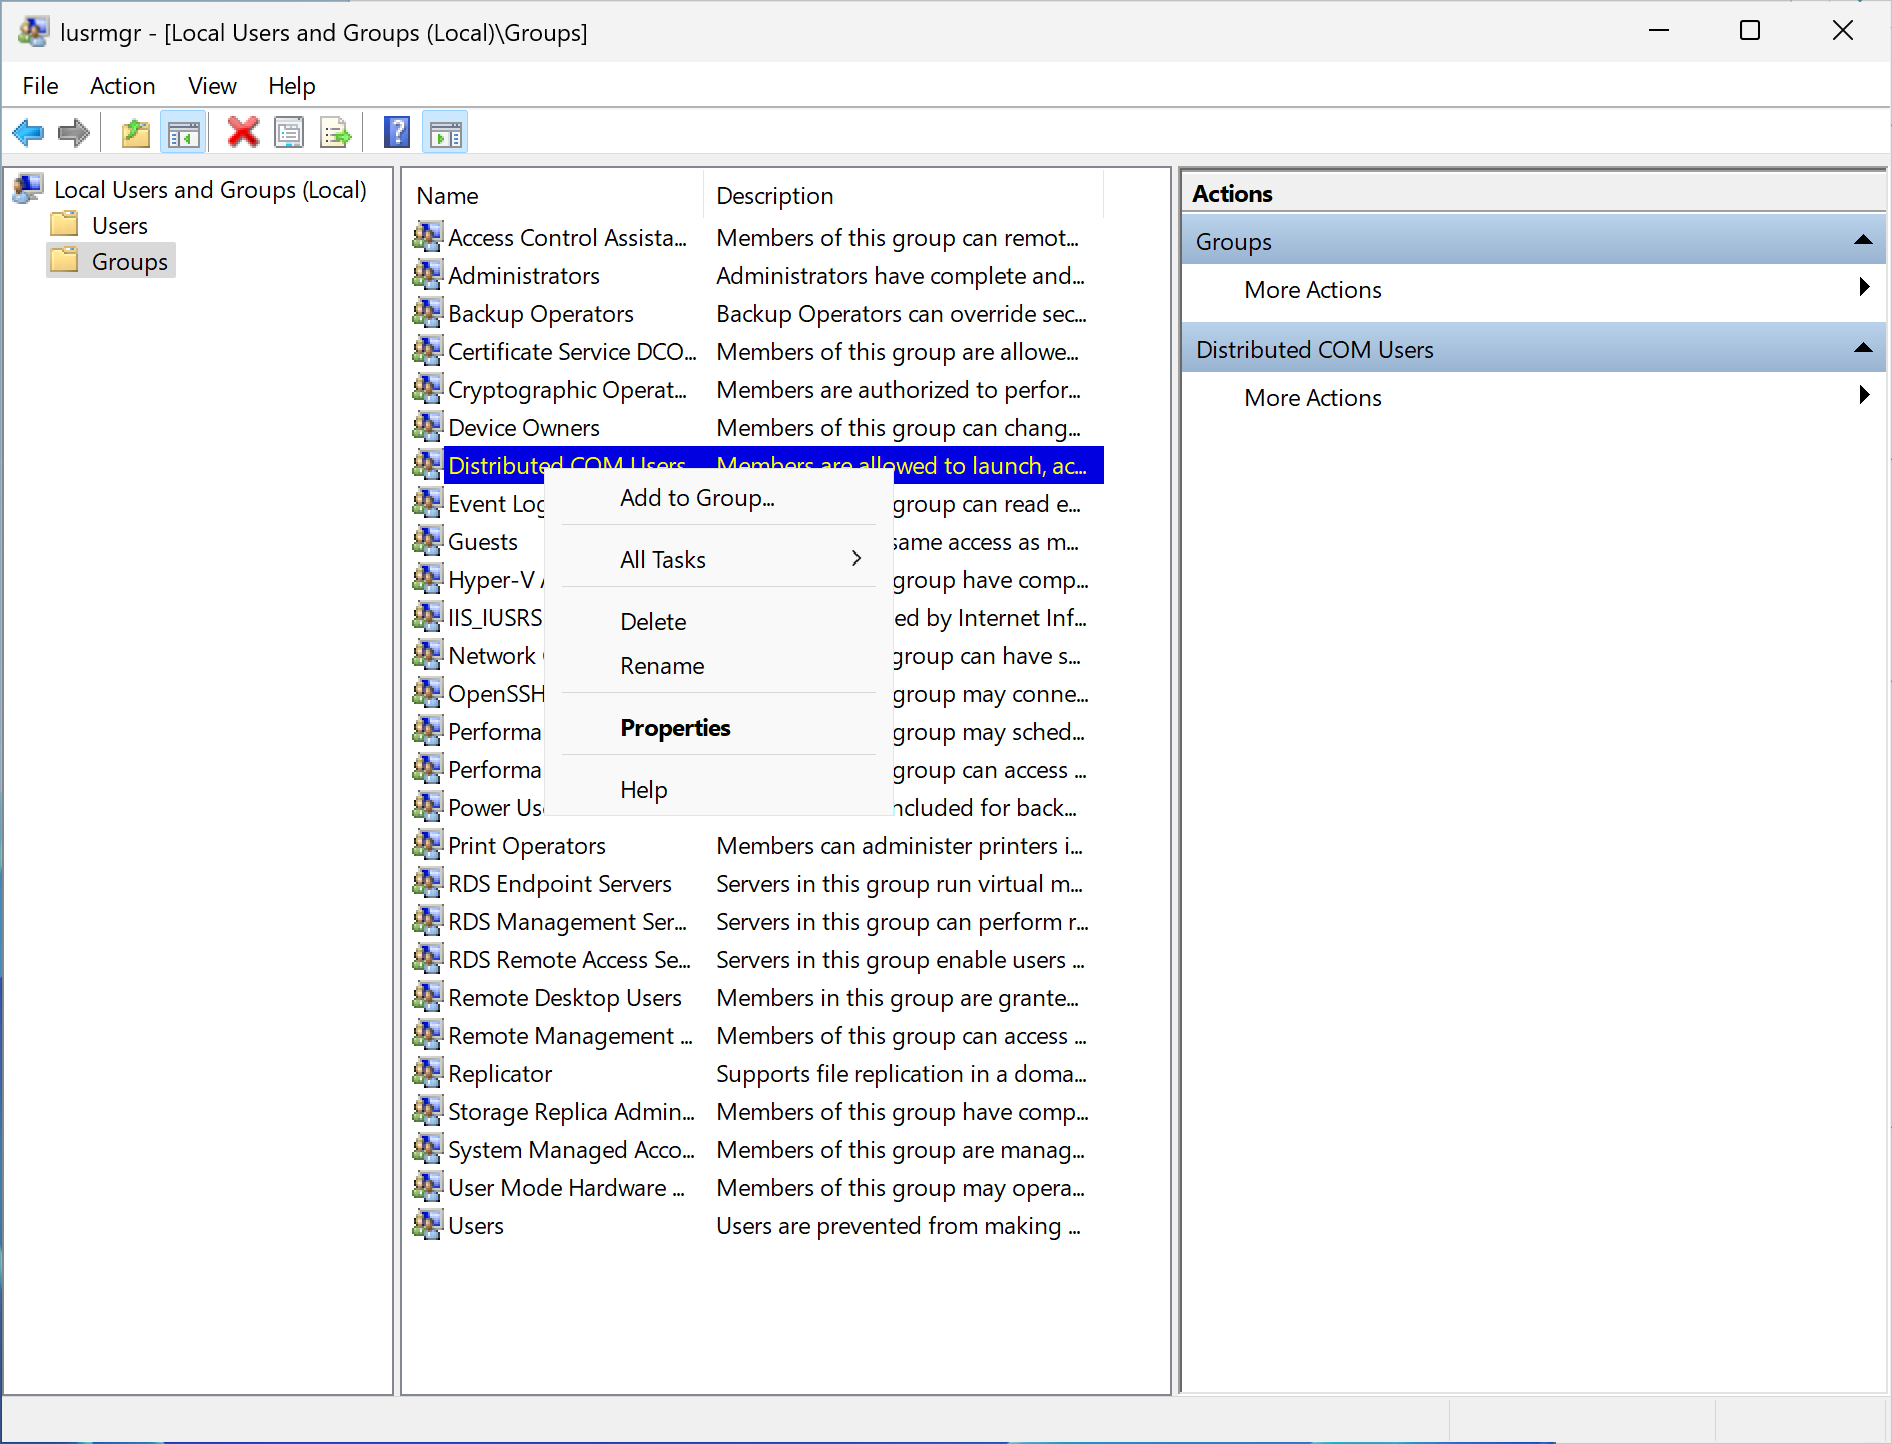
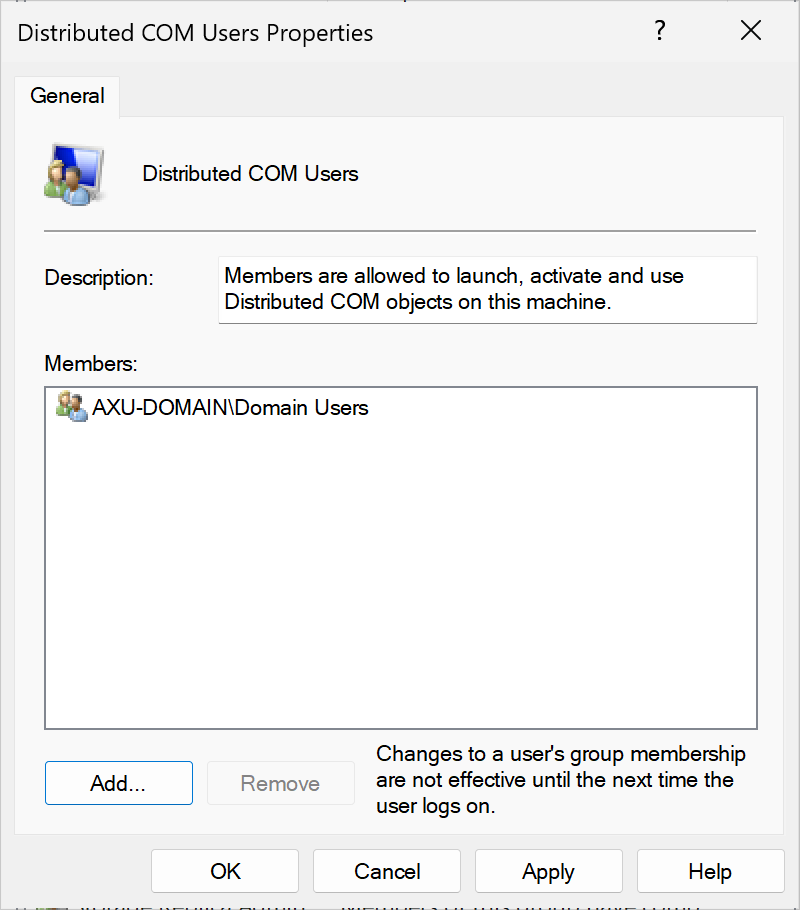
Enable Distributed COM Users
To enroll from any Windows device, you should follow the next steps. Based on the security group(s) that you assigned to your template (for example, "Domain Users"), add the same security group(s) to the "Distributed COM Users" local group on the machine using the lusrmgr.msc utility.
| Don’t forget to manage WinHorizon’s Microsoft Defender Firewall. |
WinHorizon Configurator - Connection Settings
Go back to the WinHorizon Configurator and go to the Connection tab.
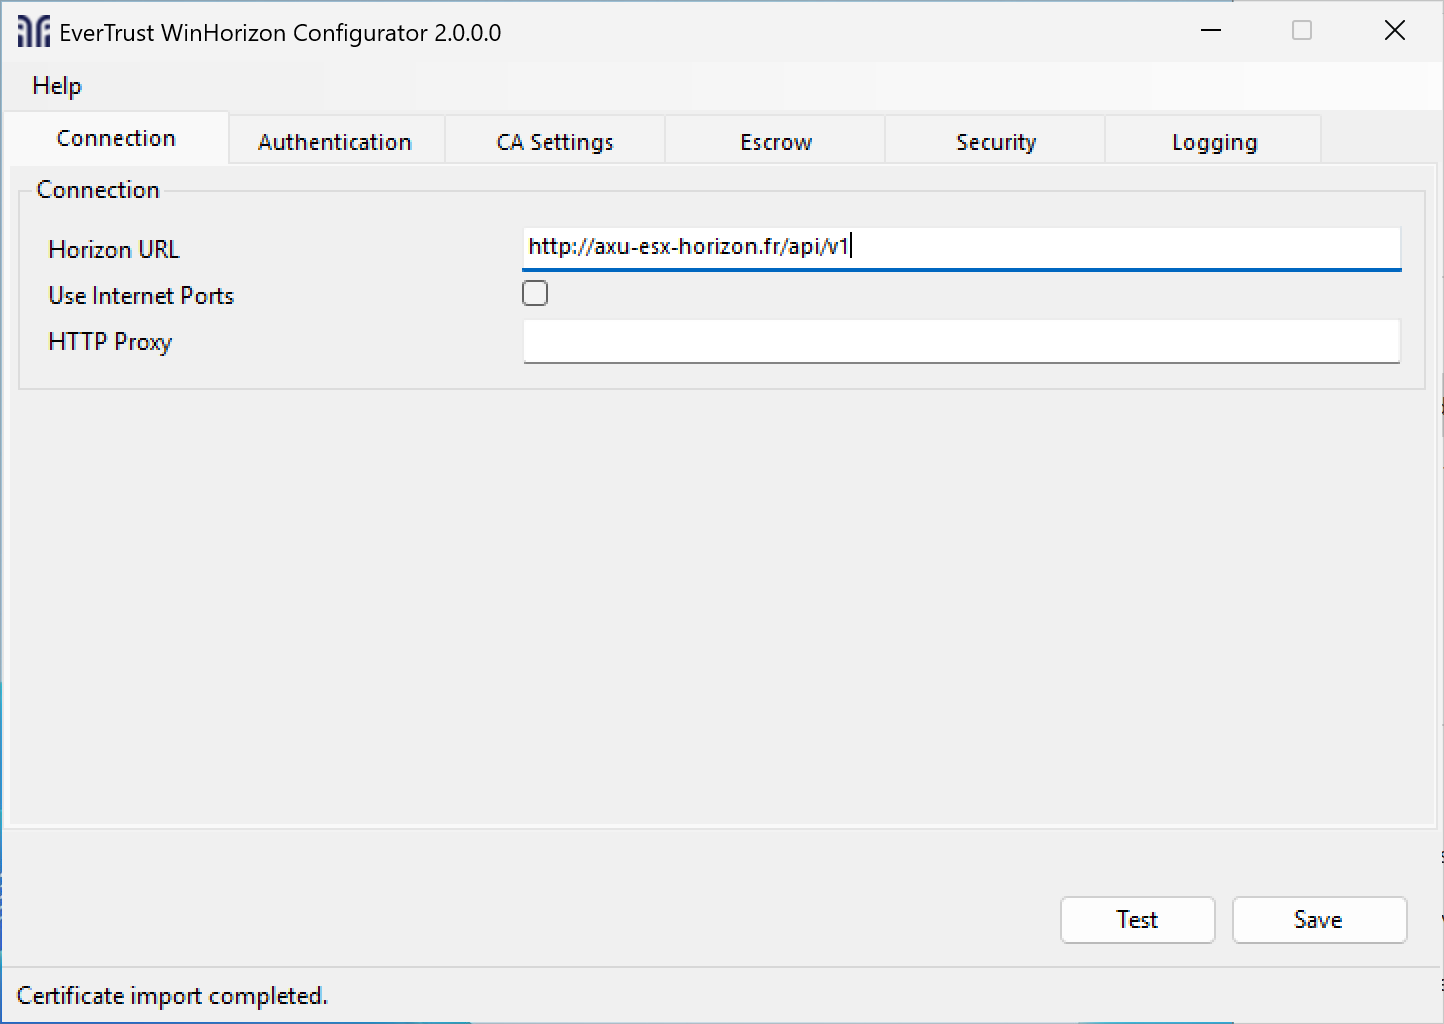
Fill the fields with your horizon URL suffixed with /api/v1.
Furthermore, if you need a proxy to reach Horizon, fill in the proxy URL as well.
WinHorizon Configurator - CA Settings
After filling the connection information, go to the CA Settings tab.
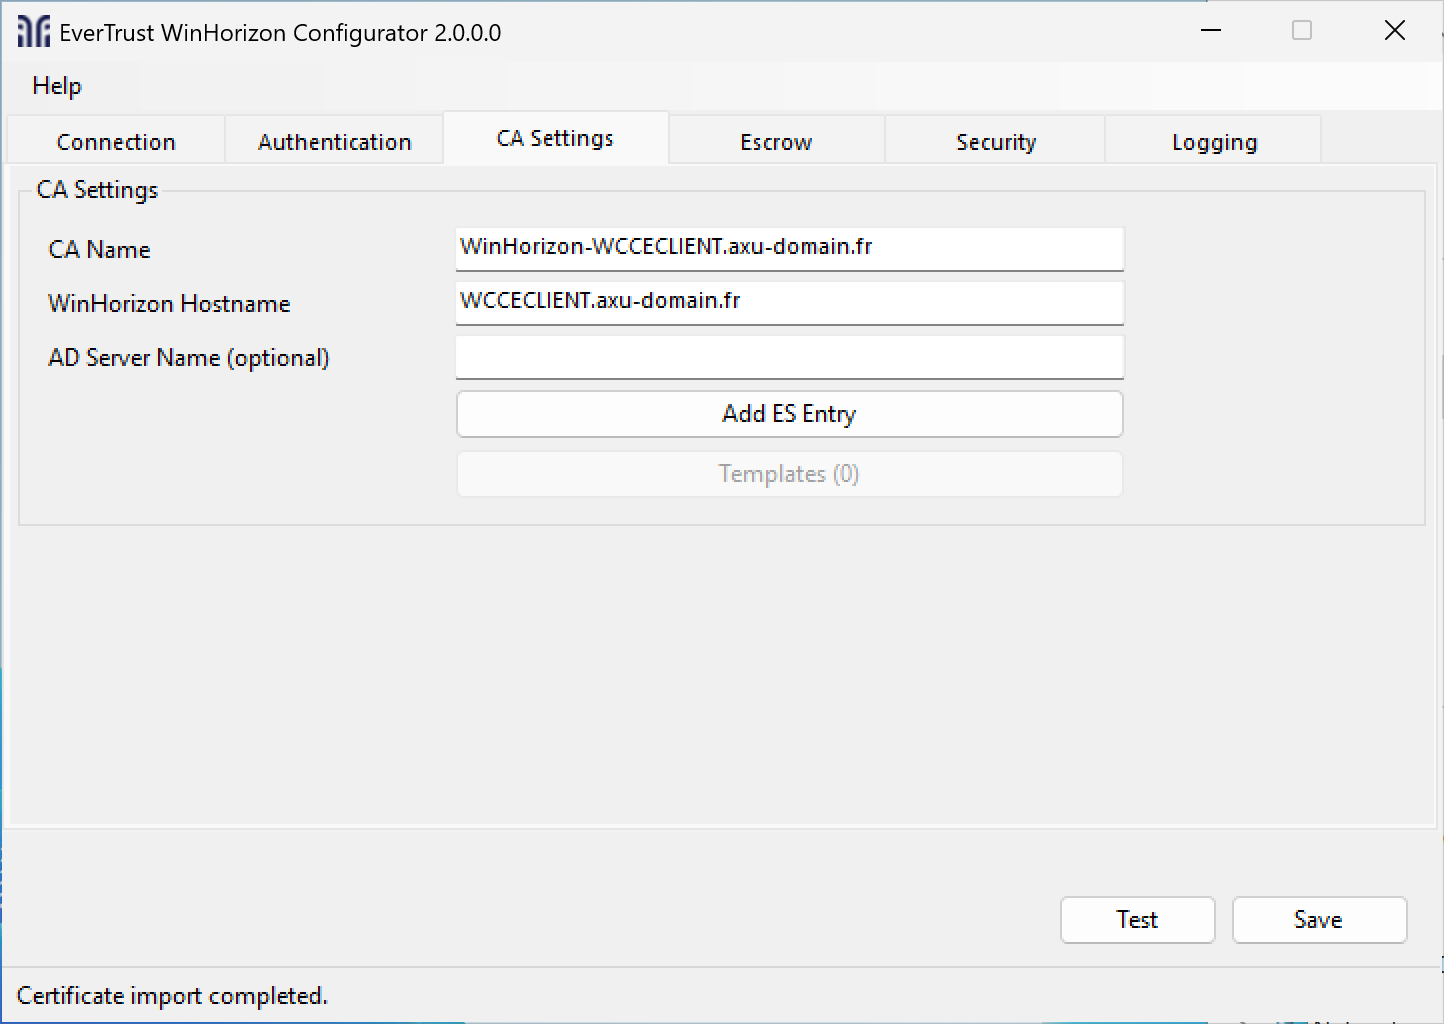
Fill in the CA Name value if it is not already filled.
| It is not recommended to edit the hostname since it is already based on your machine FQDN. |
Click Add ES Entry and import the CA certificate file that has signed the WinHorizon Certificate, most likely the Technical CA.
| To be able to add the Enrollment service entry to the Active Directory you need permissions to manage them. |
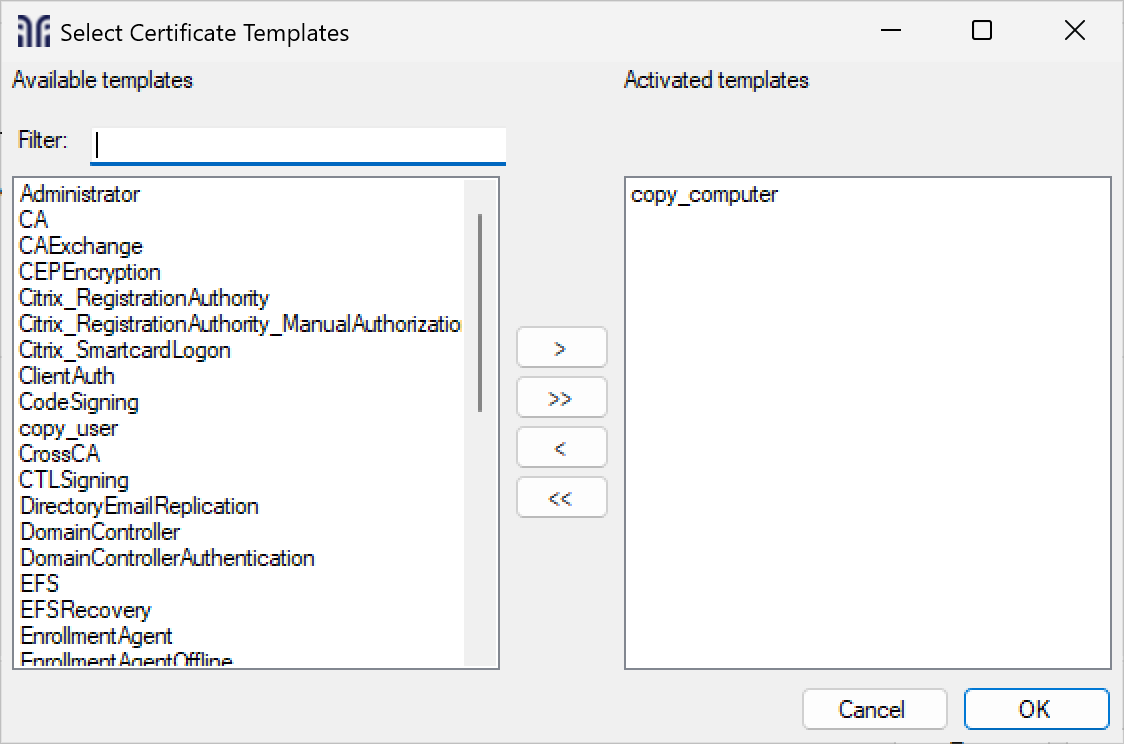
Click Templates to add the templates your WinHorizon will serve.
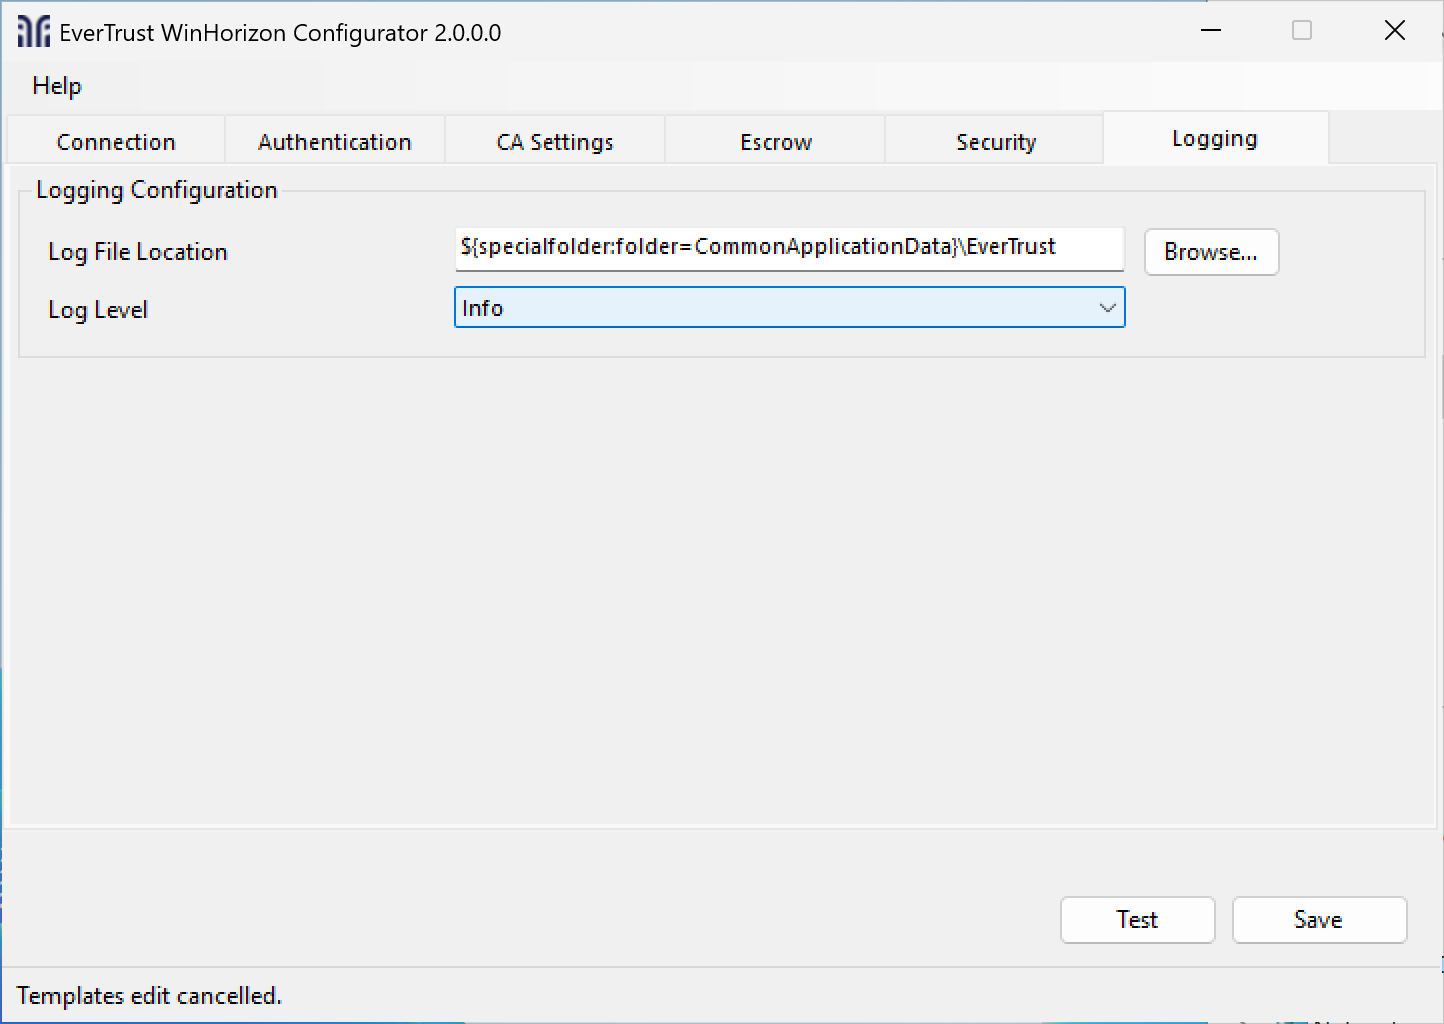
WinHorizon Configurator - Logging
Then you can setup the service logs in the Logging tab.
After the complete configuration is done, click Save and restart the WinHorizon service.
If you want to save this configuration, you can export this registry key: Computer\HKEY_LOCAL_MACHINE\SOFTWARE\EverTrust\WinHorizon
|